For a couple of weeks now, we've been working on a feature for our Plus members that we hope you'll find useful: bulk editing! Like all Plus features, this one is also designed to save you some precious time and effort so you can focus more on actually sewing. Hopefully it also makes organising just a little bit more delightful!
If you don't have Plus, but are curious about the features you get, you can read more about it in the guide.
How bulk editing works Bulk editing is perfect for when you want to change the attributes of several resources at once. For example, you might want to add the same tag to multiple fabrics or archive several notions.
You can bulk edit:
Projects
Fabrics
Notions
My details for patterns in your stash (your personal pattern tags, etc)
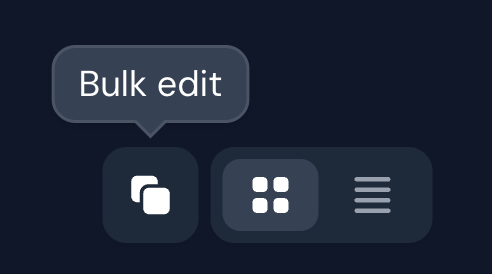
To bulk edit, go to the resource you want to bulk edit, and find the bulk edit button in the top right corner, left of the display options.
Bulk edit button - looks like two stacked rectangles
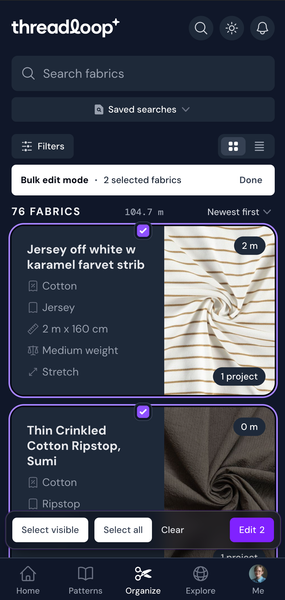
When you click the button, you will enter bulk edit mode. This changes the resource cards from being clickable links to being selectable items. A checkbox will appear at the top center of the card, but you can click anywhere on a card to select it. It will get a colored circle around it once selected.
You'll also see a new toolbar at the bottom of the screen, as well as a little banner at the top that shows how many items you've selected (along with a 'Done' button you can click once you're finished).
Click individual resources to select them, or use the multi-select buttons in the bottom toolbar. 'Select visible' selects all resources currently on screen (up to 20 items), and 'Select all' selects every item in your results (in the example below: all 76 fabrics I have).
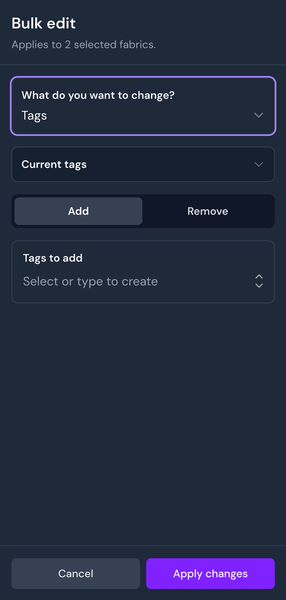
When you've selected the resources you want to edit, click the "Edit" button in the bottom right corner. This will open the bulk edit options. Here you can pick what you want to change, and how you want to change it.
Depending on the resource you're bulk editing, you'll get different choices in the bulk edit options.
Bulk edit mode in fabrics
Bulk edit options
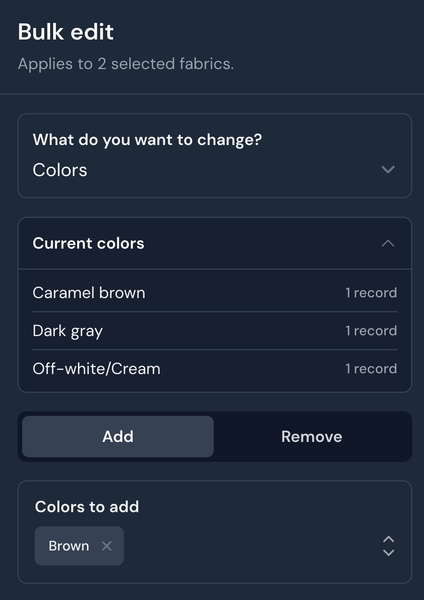
Example: adding or removing colors In my fabric stash, I've selected two fabrics that I'd like to add the color Brown to. I choose Colors for what I want to change. Below this option, I can click Current colors to see what colors the fabrics currently have. This is collapsed by default, but you can click it to double check what attributes are currently set.
For most things you'd like to bulk edit, you can choose between adding and removing something. In the first example, I'd like to add a new color to both fabrics, so I choose Brown in Colors to add. Once I'm happy with my choices, I'll click the 'Apply changes' button at the bottom of the screen.
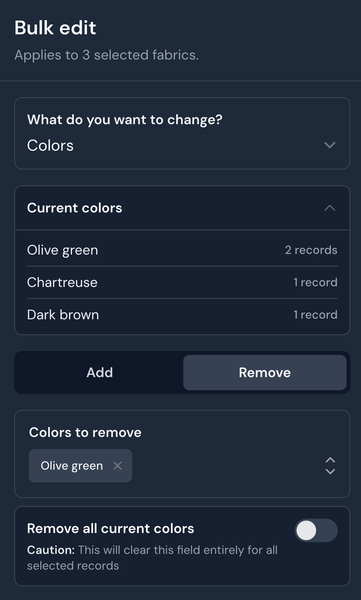
The process is very similar if I want to remove a color, except then I'll choose the "Remove" tab. Here, you also get the option to remove all colors at once. If you toggle this option, all colors will be removed from your selected fabrics.
Example 1: Adding the color 'Brown' to two fabrics
Example 2: Removing the color 'Olive green' from selected fabrics