Creating a project on Threadloop is easy, and the first step towards finally organising your sewing ideas!
Watch this video to see how you can use Threadloop to plan your sewing projects, or continue reading for a quick overview.
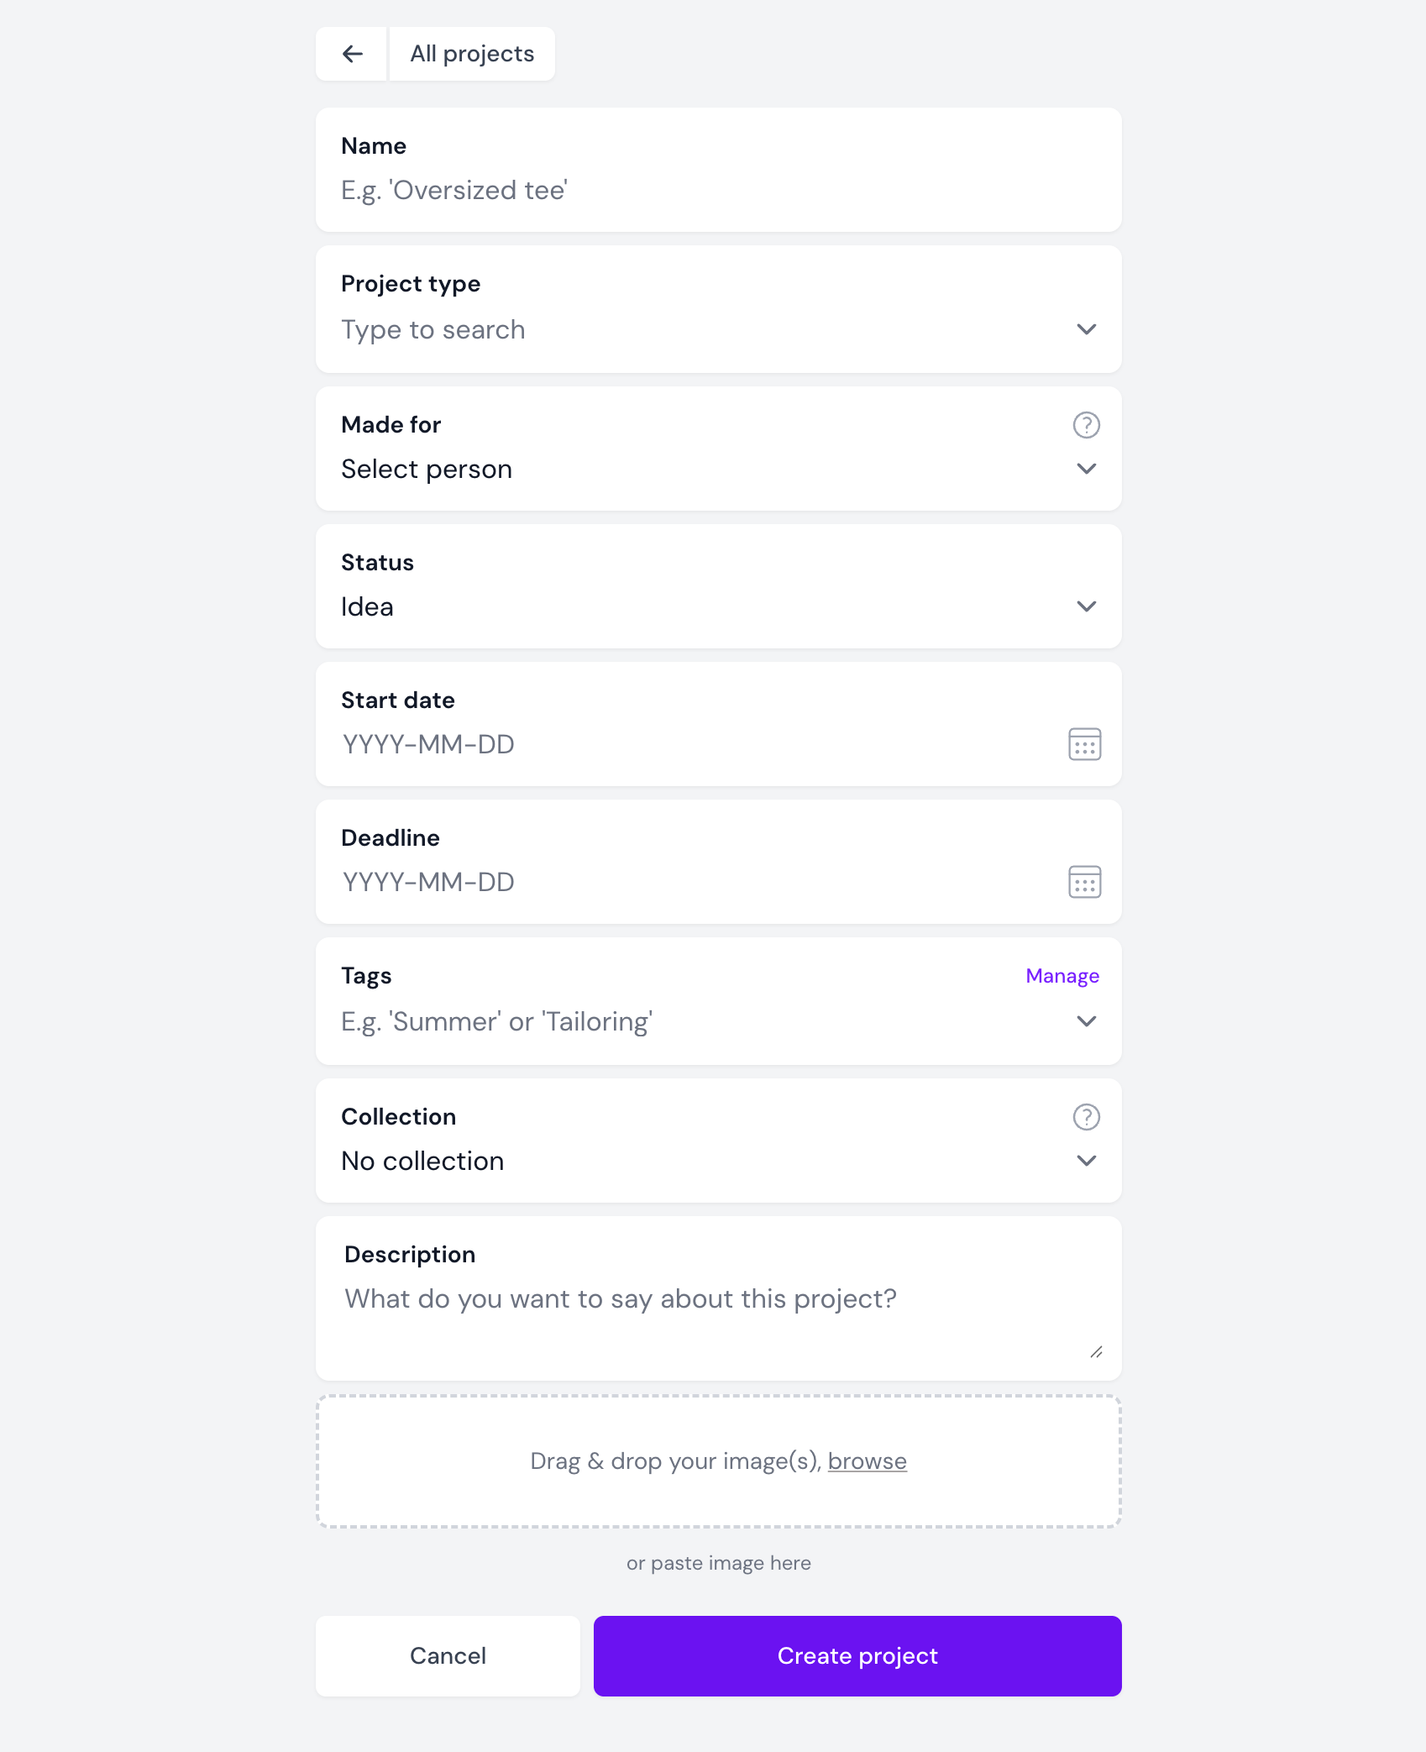
Simply navigate to the Projects section and click 'new project'. You will then get a form to fill out. All of these fields are optional, but we do recommend at least giving your project a title before continuing. You can name your project whatever you want, but it might be helpful to give it a descriptive title that makes it clear what this project is, like 'Cropped denim jacket'.
In the next step, you will be able to start working on your project! Let's go through the different sections.
Project header
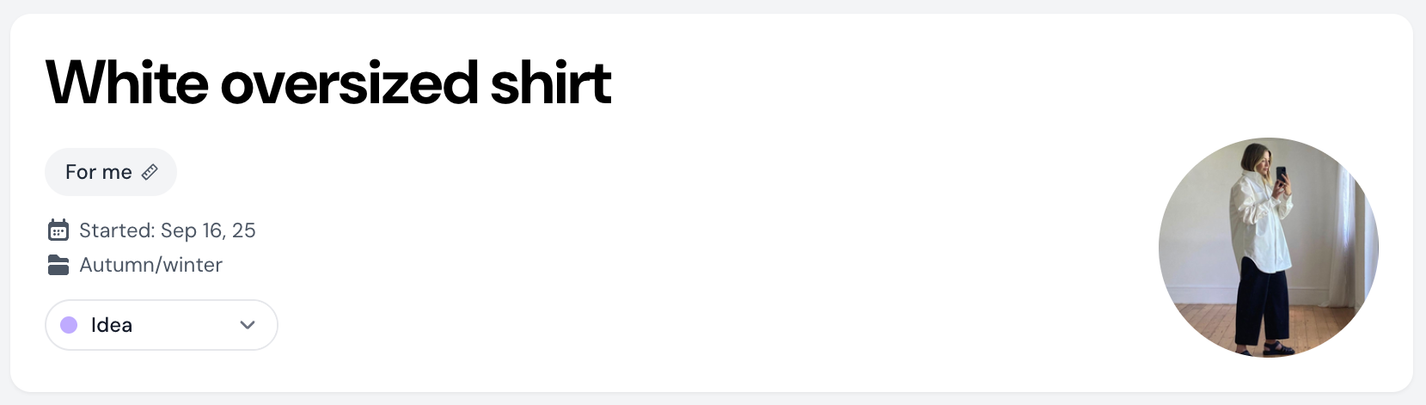
The header includes the main details about your project, including the title, cover photo, description, dates, tags, etc. It also includes a dropdown to quickly change the status of the project. To change any of the main details, click the options button in the top right corner (three dots) -> Edit project.
Project header
Workspace
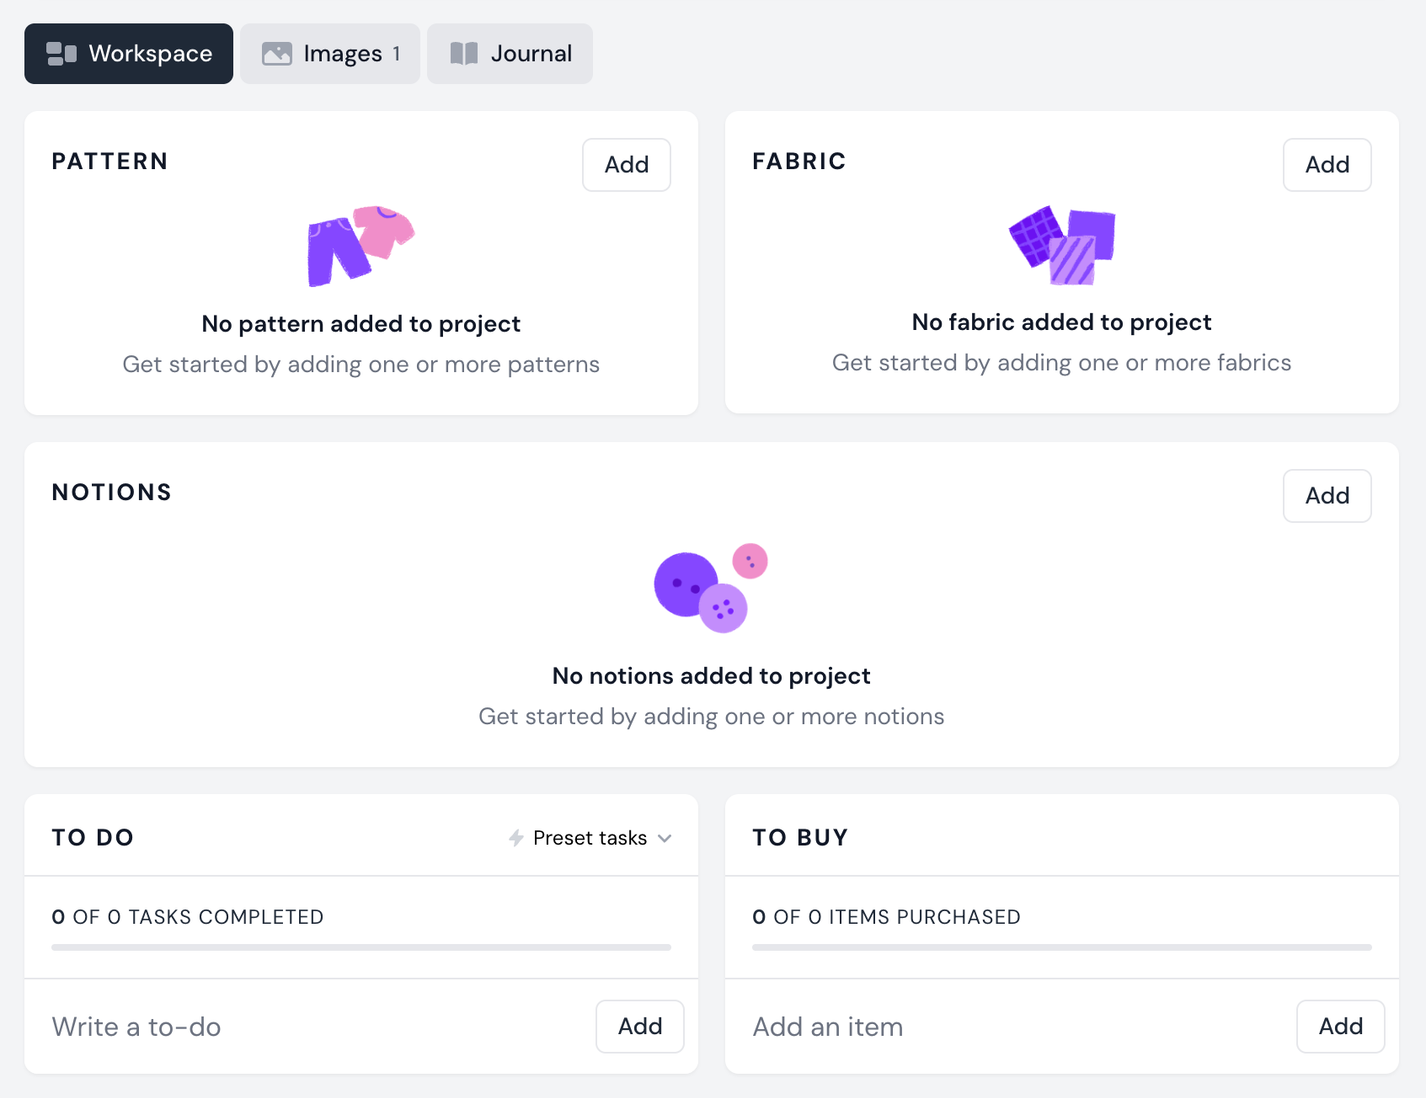
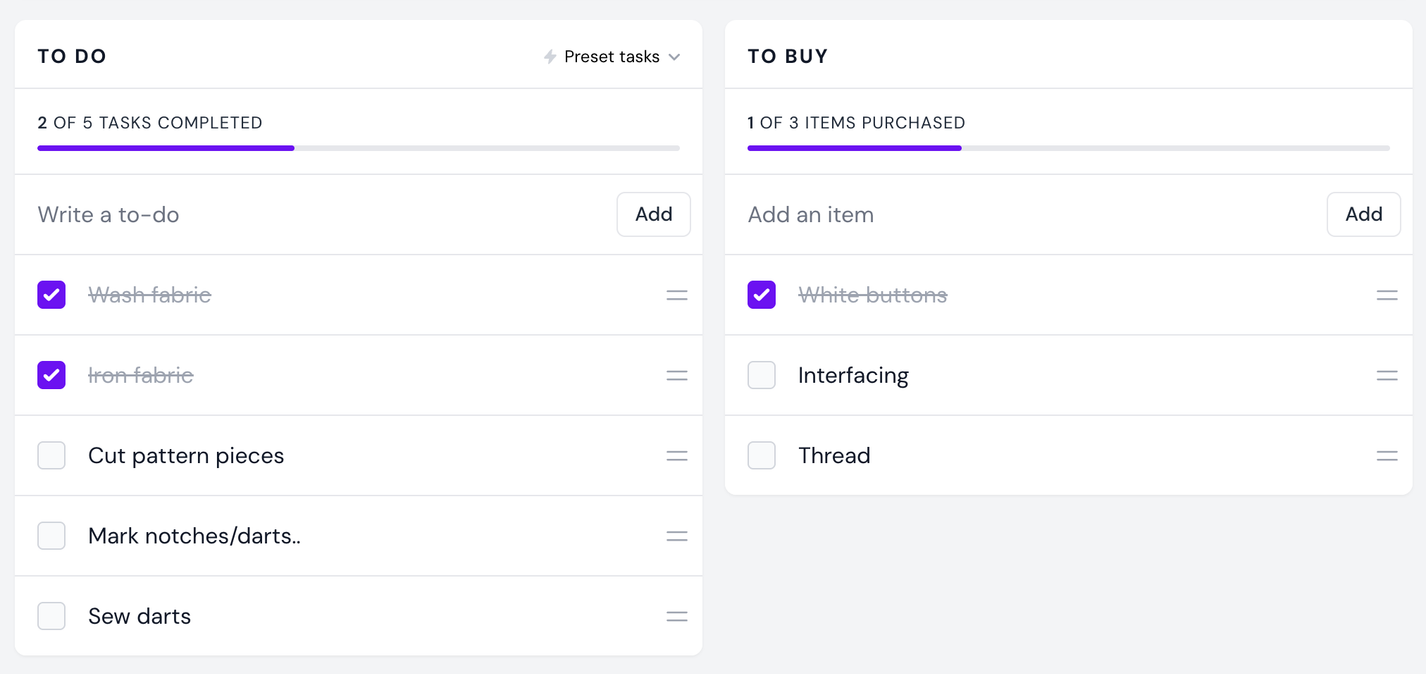
Here you can add patterns, fabrics and notions to your project, as well as a to do and to buy-list. If you are in the idea stage, you can add multiple patterns or fabrics until you've narrowed down your choices.
Workspace
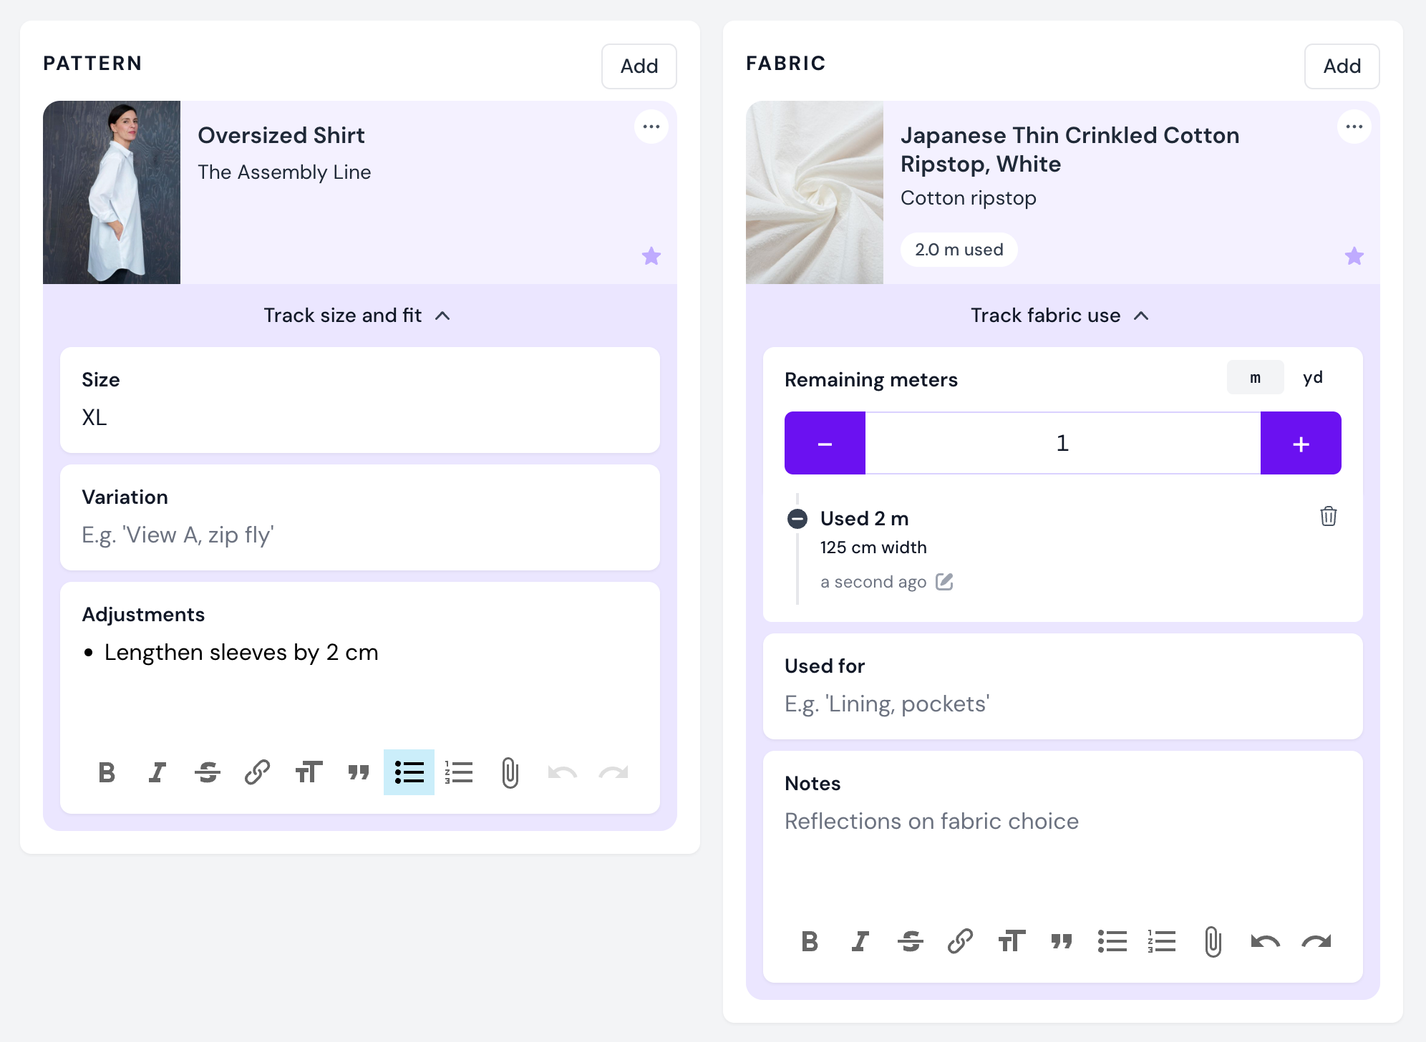
Once you've added patterns, fabrics or notions to your workspace, you can track size, fit and use for each resource by opening up the accordion. It's highly recommended to note down size and adjustments on the pattern you've chosen, as this will make it much easier for you when you make something using that pattern again. Tracking how much fabric you've used straight in the project is also the best way to log fabric usage. All this information is also very valuable to other members and easier to find for them if you share your project.
Add additional information and track usage
To do & to buy In this same section, you can add any tasks or shopping items related to this project. To add items, simply type into the text field and click Add.
Items can then be checked once they're completed or bought. To edit or delete an item, simply click the text and you will be able to rename or delete it.
For plus users, these to-do and to-buy items will appear in the global lists
Images
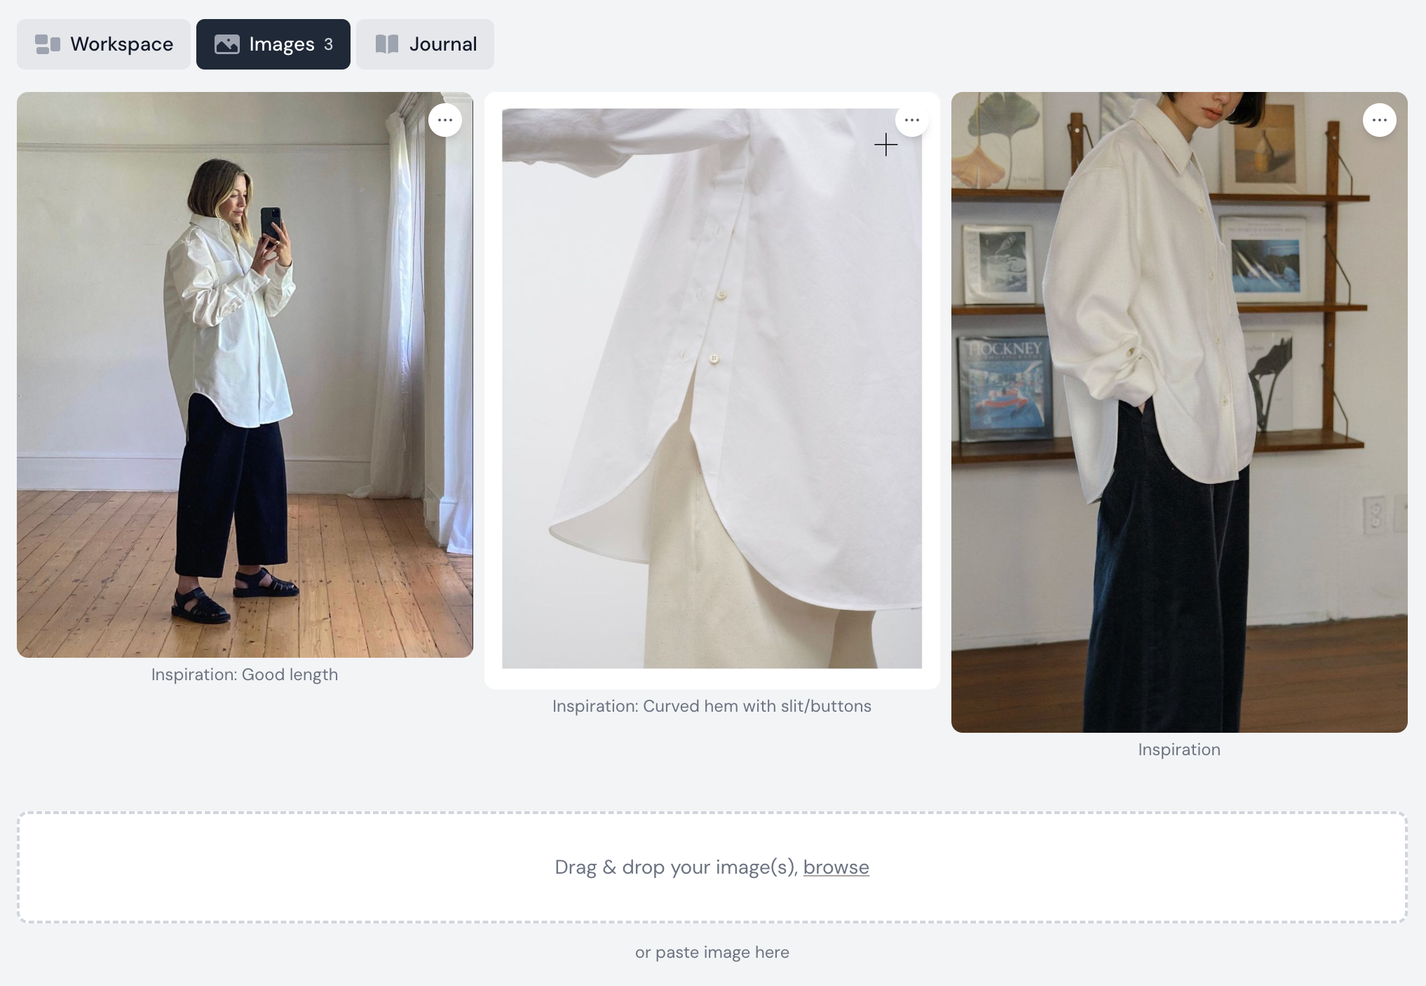
To add any images to your project, go to the Images tab and drag & drop your images into the image drop zone (or click 'browse').
Here you can add any images you'd like. For example: in the beginning of your planning, it might be useful to add any inspiration photos. If you are going to share your project with these images included, it will be helpful if you caption it with 'inspiration' or where you found it, so it's not confused with your own images.
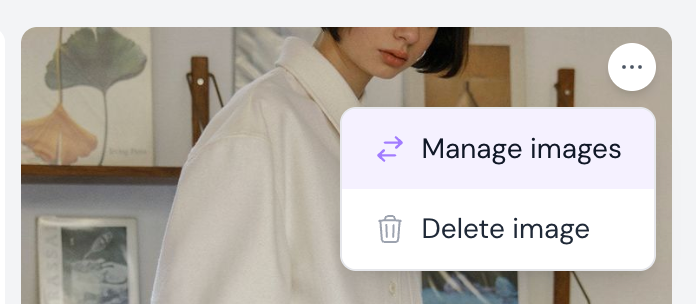
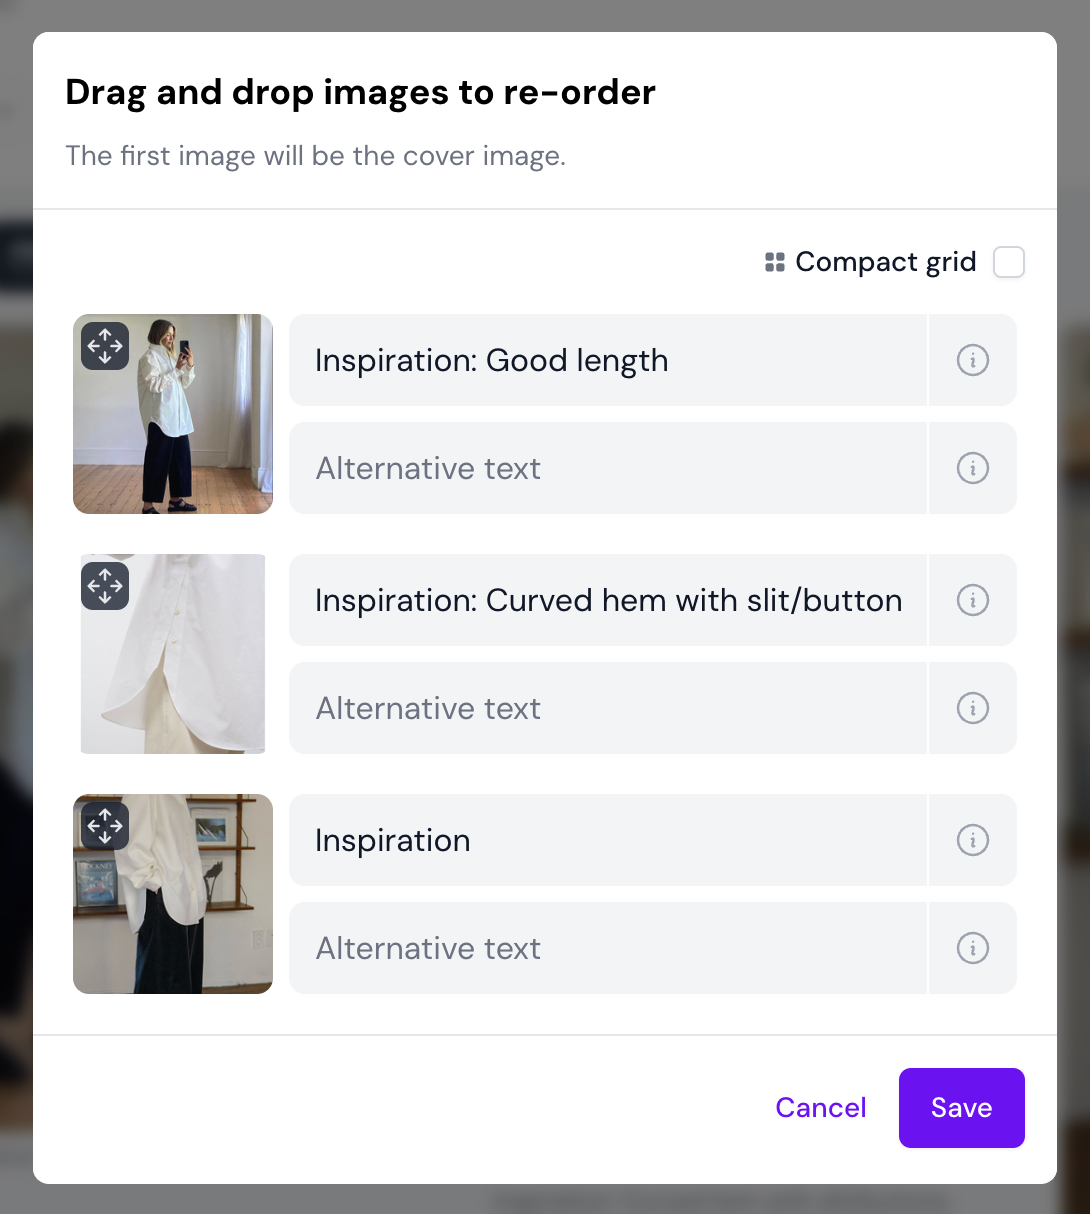
You can manage the order of your images and/or add captions or alt text by clicking the options button on any of the images -> Manage images.
This will open a screen where you can see all your images in a list. To reorder the images, click the handle icon in the corner of the photos (arrows pointing outwards) and drag the image to its correct position. If you have a lot of images, it might be helpful to toggle on the Compact grid so you can see more of the photos on your screen. This will temporarily hide the caption and alt text fields.
Manage images
Journal
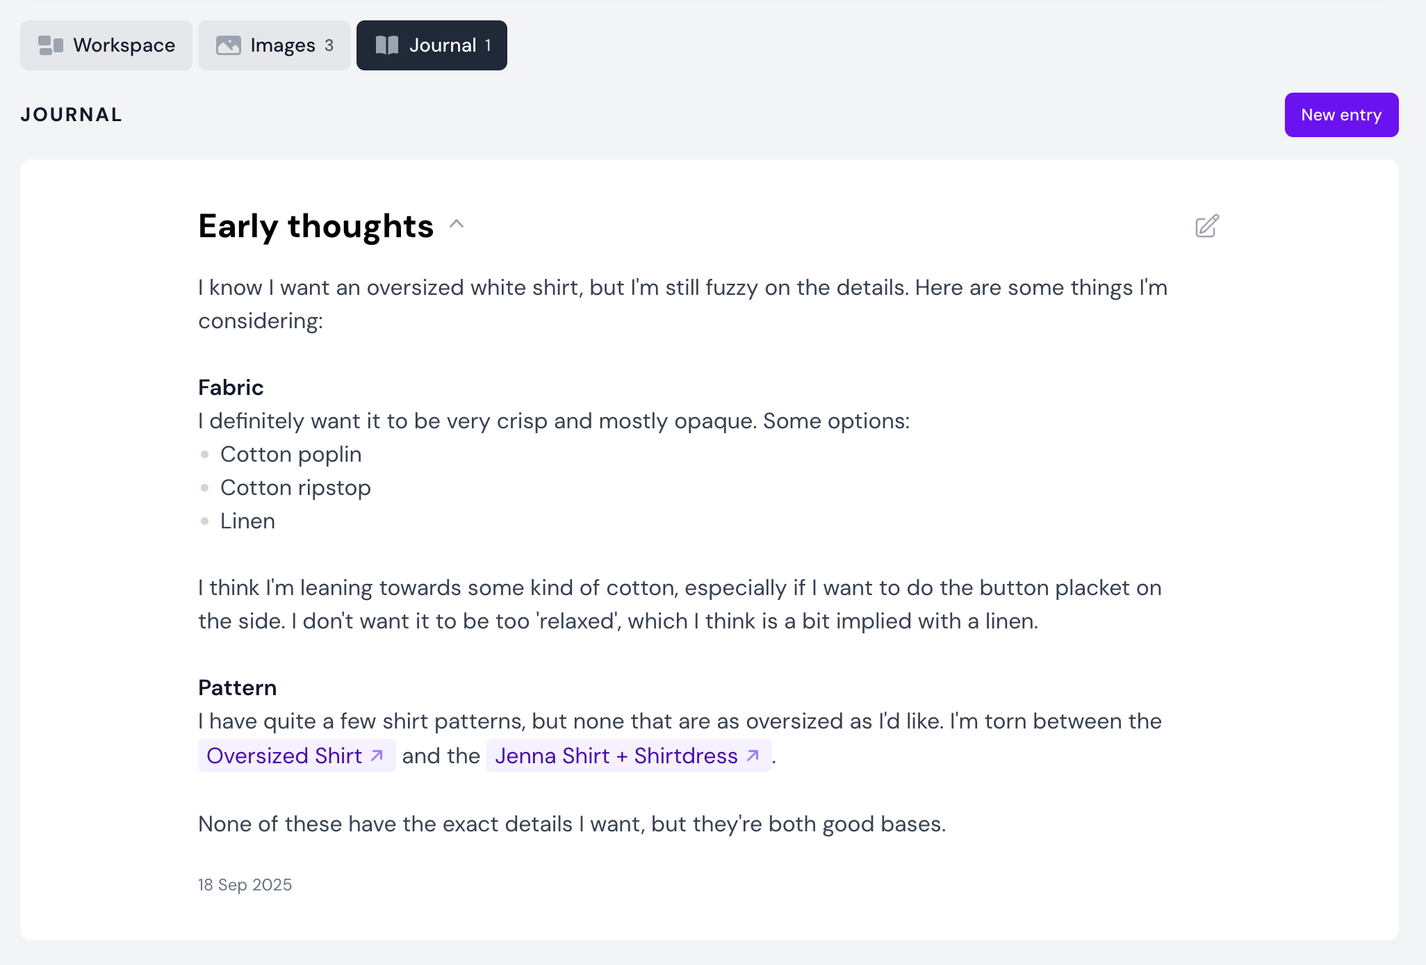
For more elaborate notes and documentation, the journal is the perfect tool. You can use this space to elaborate on your inspiration, document your process or note down your thoughts as you work on the project.
The journal has a rich text field, which means you can format it however you like with bold and italicised text, links, headers, quotes, bullet point/numbered lists, images, etc. You can also tag patterns and designers
An example of a journal entry
Editing a journal entry To edit a journal entry, click the pencil icon in the corner. You'll then be able to make any changes to the title or body of your entry, as well as changing the date and time, or making it a private entry. This means it will only be visible to you, even if you share the project.
Collapsible entries If you have a lot of journal entries, you can collapse the ones you're not interested in right now by clicking the title of the entry. Click the title another time to open it again.
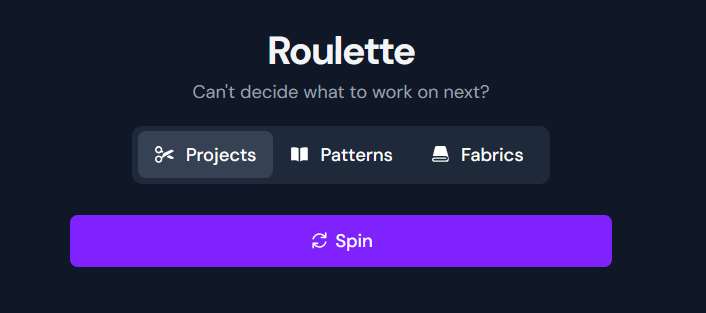
Roulette
Even if you've been diligently planning your projects and logging your stash in Threadloop, you might still feel overwhelmed by all the options. You have time to sew, but you're not sure what you want to work on? Or perhaps you're just indecisive?
The roulette is a fun little feature that might help you decide what to sew next! Simply spin the roulette and let it choose for you. You can spin a roulette for Projects, Patterns or Fabrics
You will find the roulette under "organize" in the menu bar
Filters We've included some simple filters for you to limit the types of resources present in the roulette. After spinning once, you will have a small settings button to apply filters to the roulette